Tips for violinists: how to fix simple issues with your violin
Violins are fiddly little things when you're not familiar with them! We get a lot of violins brought into the shop for repairs and often the work they need is simple stuff we can do on the spot. We're more than happy to do this but since 2020 has been a year where getting into a shop for help isn't always easy we thought it might be a help to post examples of some of the simplest fixes in case they're a help to anyone!
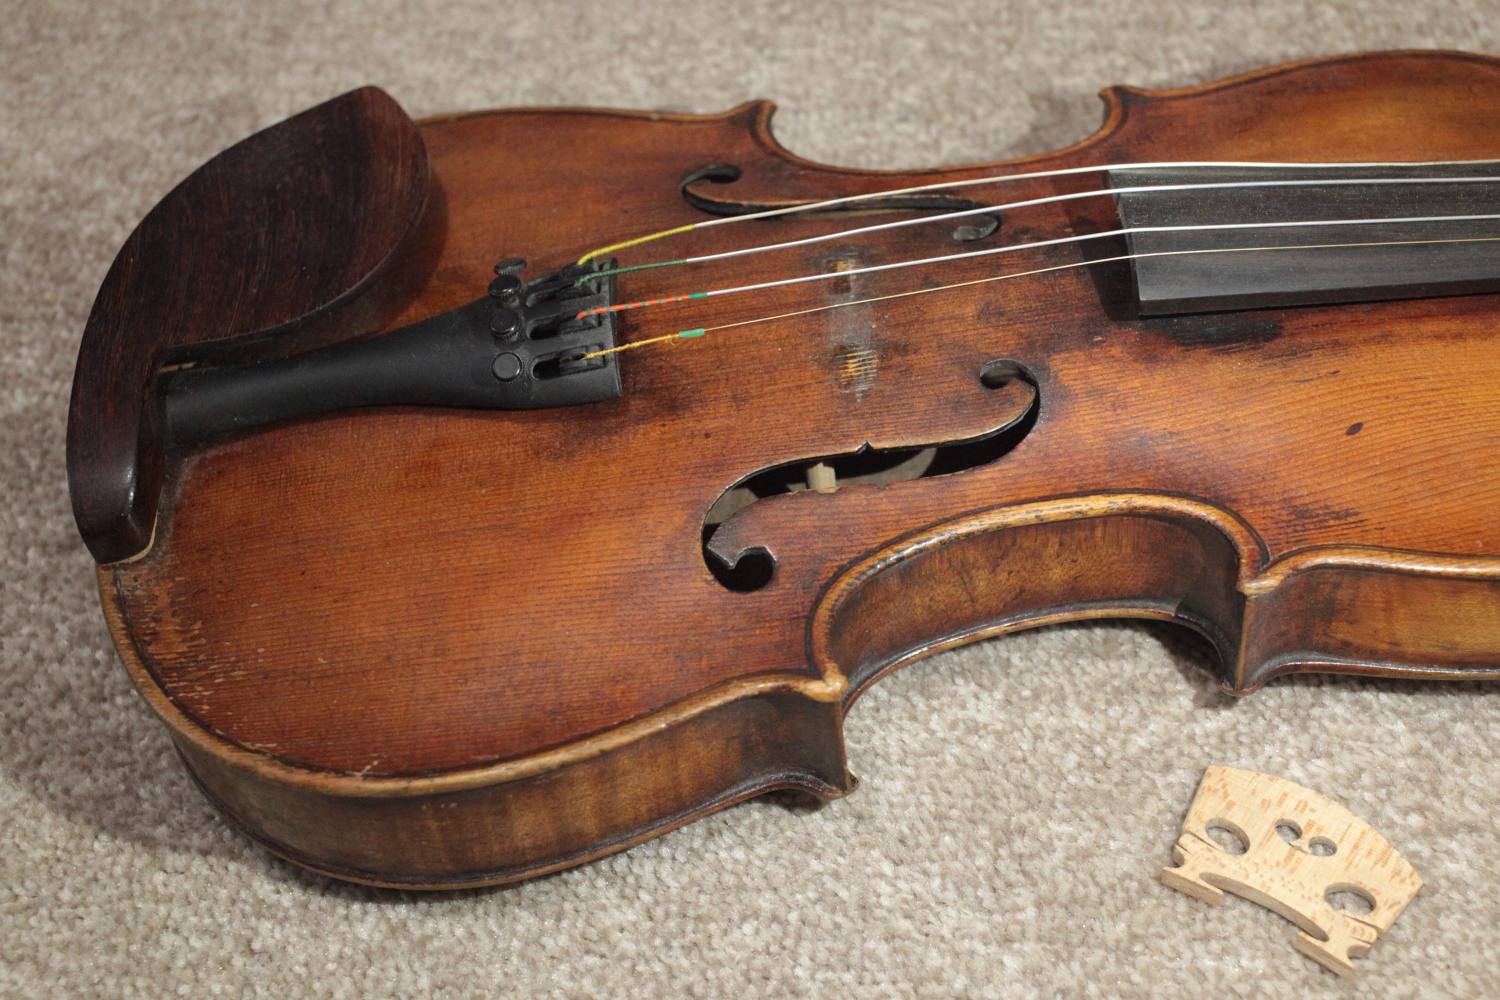
My bridge has fallen over!
This is a nice easy one. The bridge of your violin is only held on with string tension so it's relatively easy to easy to dislodge it and equally easy to put back.
Firstly, look inside the treble side F hole to see if the sound-post is still up: this is a dowel stick that sits a little behind the treble side foot of the bridge, and it's important for structural stability. If the sound-post has been knocked over it will need a trip to a violin shop as there's a specialist tool for putting it back in place. In practice, in practice, the sound-posts in violins tend to stay put when the bridge falls over, but it's important to check.
If the sound-post is up, then loosen off the strings by a third of a turn of each peg so that the strings feel loose but not completely slack. Alternatively, if the bridge is down because the strings came loose, you'll have to tighten them a little, again making sure they don't feel as tense as they would normally do.
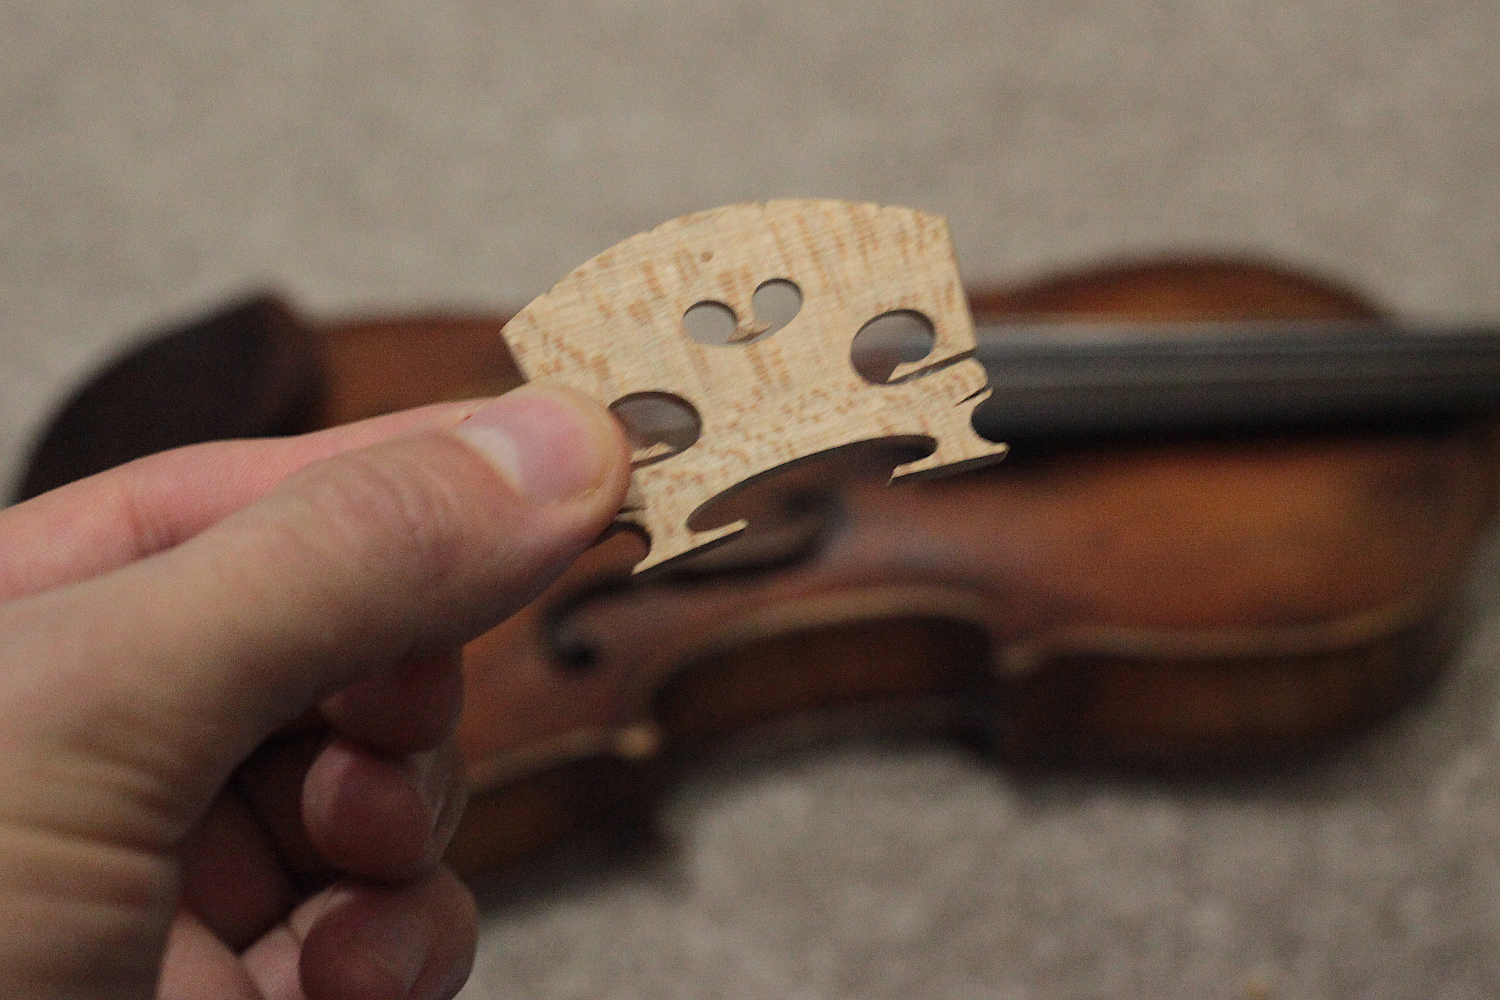
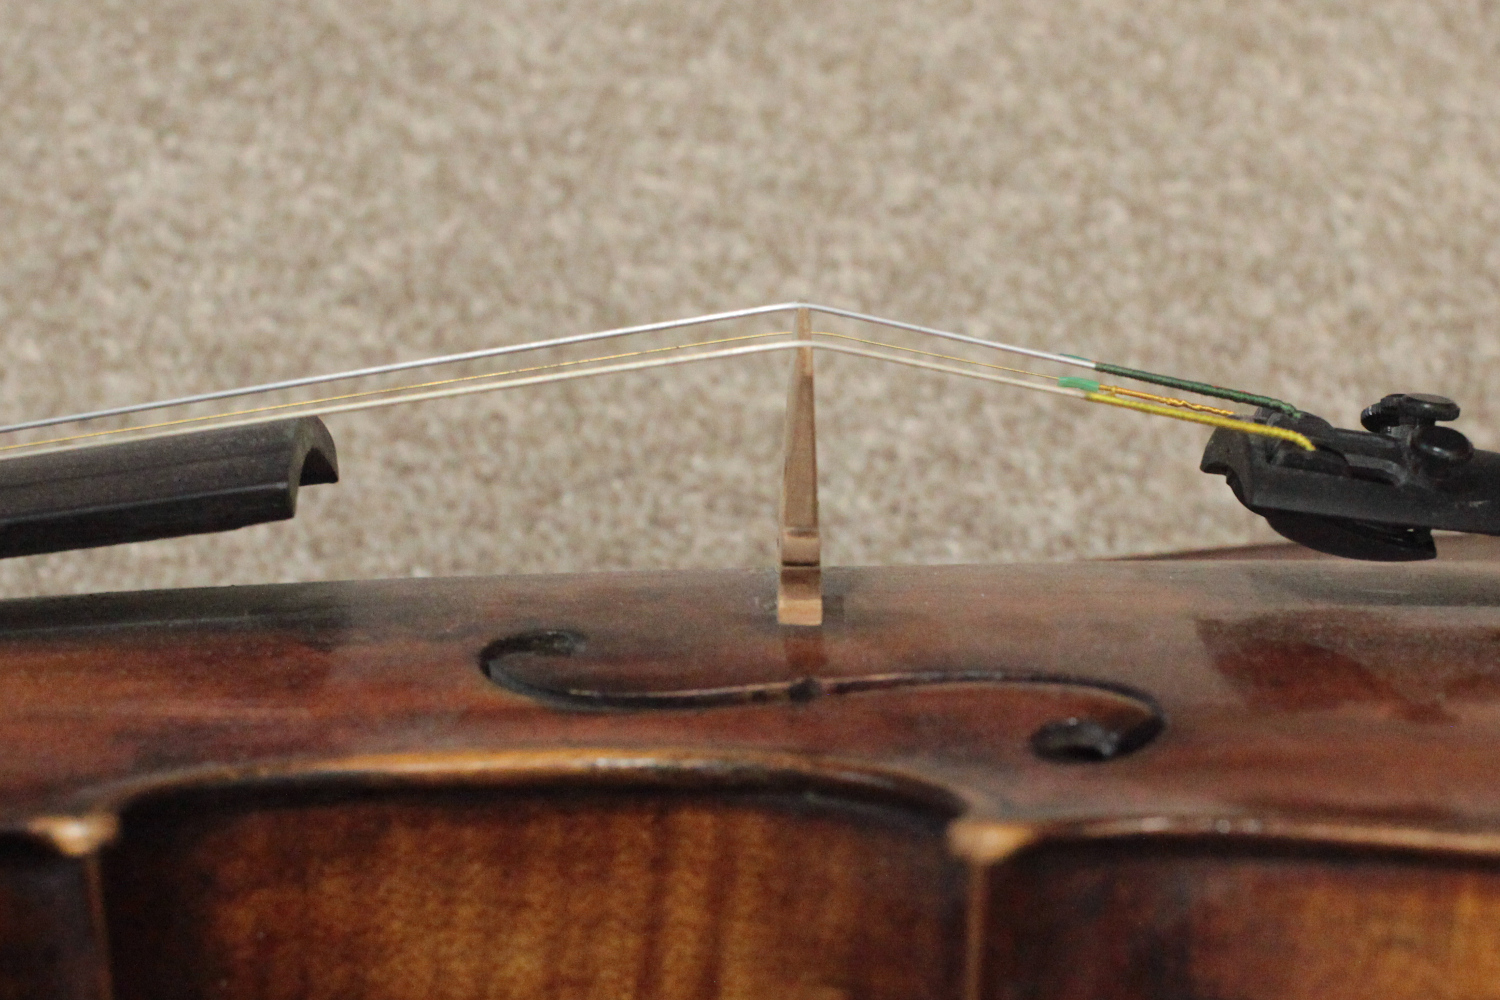
Next hold the bridge up so you can see it front on. You should notice that it's not symmetrical but slopes down on one side: this is the treble side (the side with the thinnest string, if you're an unmusical parent trying to figure this out).
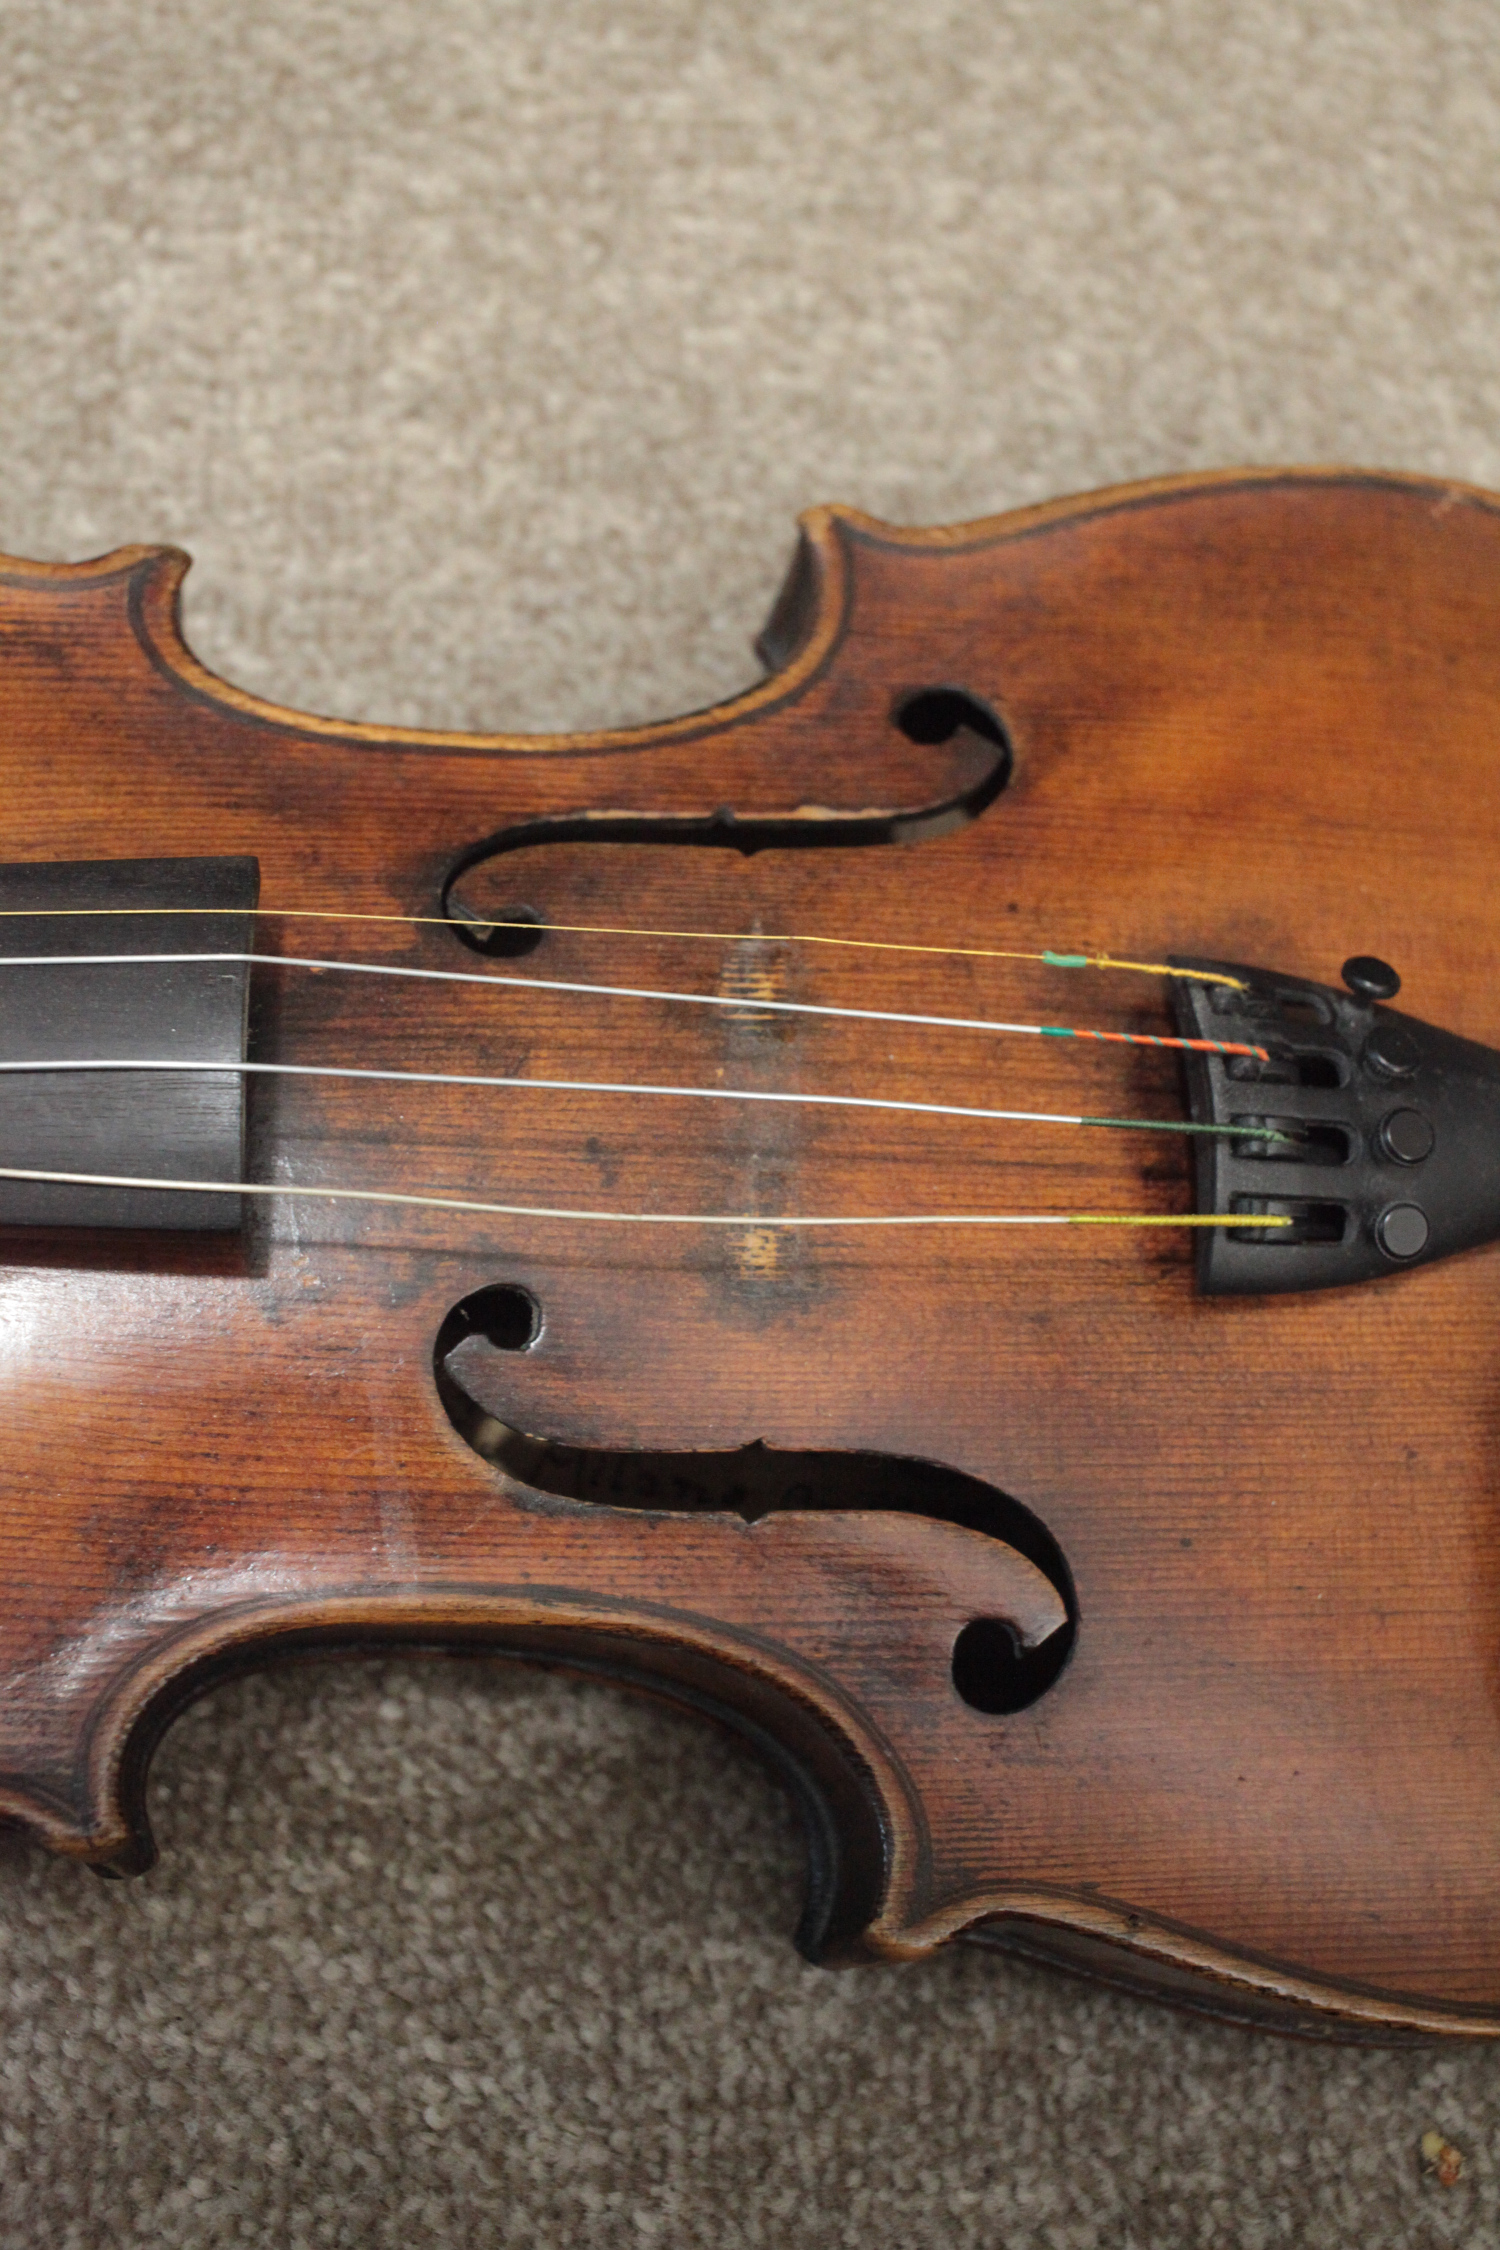
Back to the violin, now look at the violin F holes: you'll see little nicks in each curve about halfway down, and those give you the bridge line.
Now hold the bridge under the strings so that the feet line up roughly between the two little nicks and gently rotate it into the upright position. If it feels like the strings are resisting too much, stop and loosen them a little more – in practice it's possible to put a bridge up even with the strings at full tension but it takes a bit of confidence and we want you to be comfortable doing it.
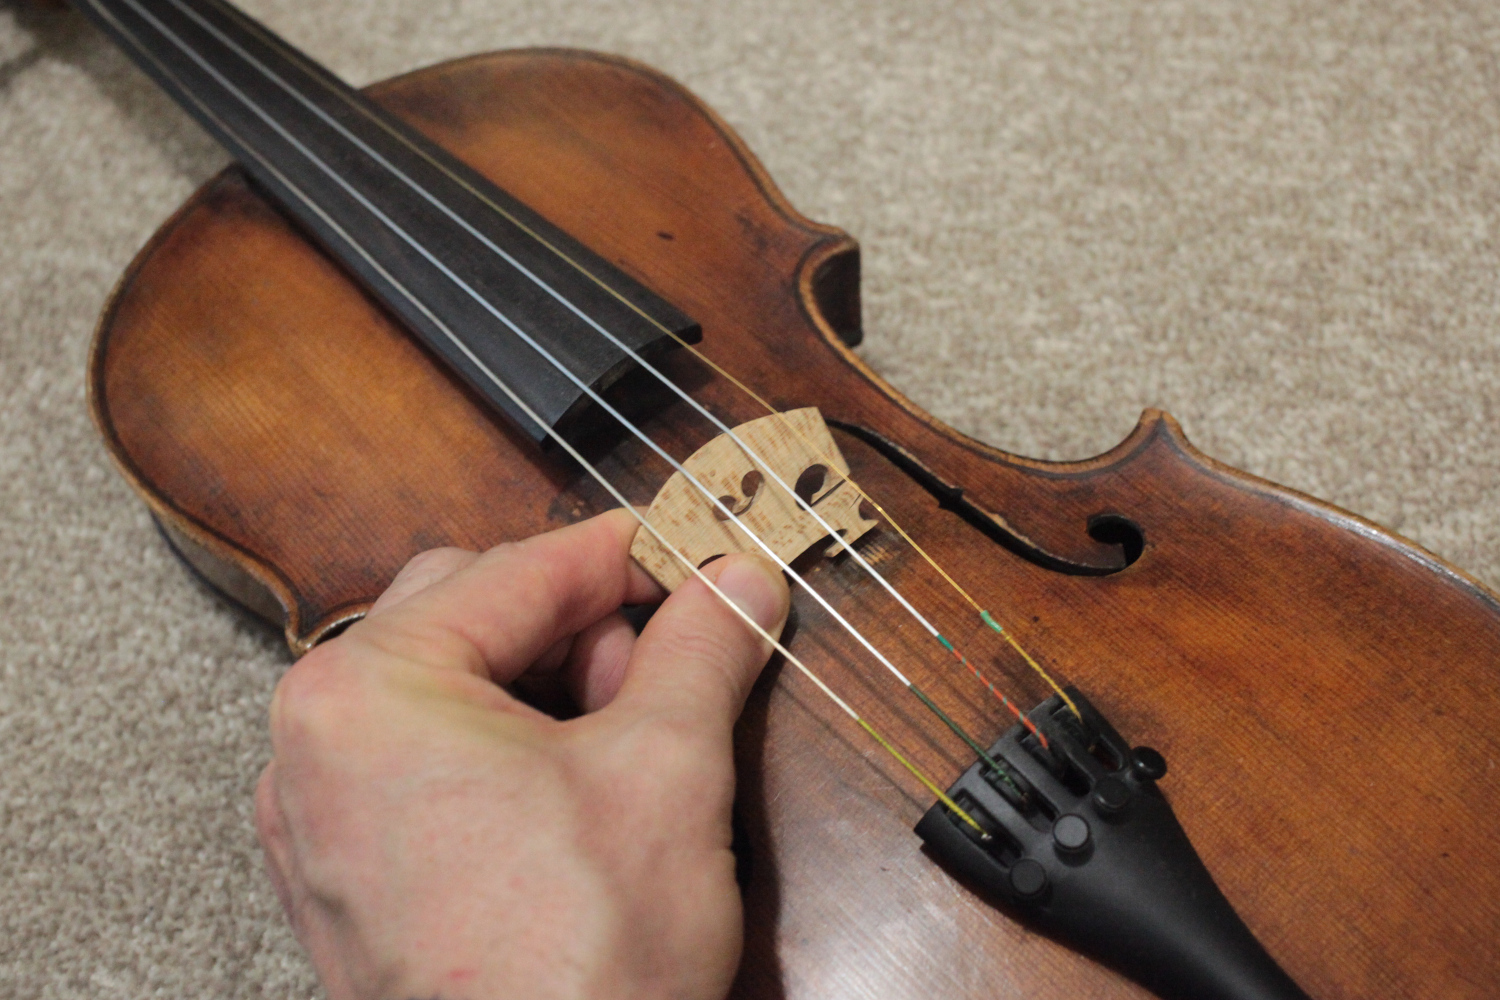
Once the bridge is up, quickly check that it's in the right place between the F hole nicks and that it's central to the violin: if it isn't, grip the bridge between the thumb and forefinger of each hand and gently move it into position. I can't demonstrate with both hands and take a photo but you want to support the bridge as much as possible - it's quite delicate across the middle and you don't want to snap it moving it about.
You also want to be sure the bridge is correctly upright and not about to topple over again, so look at it side on to check the angle: you're looking for the back edge to be at 90 degrees to the body. When the bridge is upright you should be able to see the bridge feet making full contact with the body – if the bridge is not up straight there will be a gap under one side.
Lastly, tune the violin up to pitch, keeping a close eye on the bridge – it may start to lean towards the neck and in that case, gently grip it between thumb and forefingers again and push it back upright.
Once you're up to pitch you're ready to go!
My pegs don't work!
Violin pegs are one of those things that are fine when you know what you're doing with them but if you're not familiar with their quirks they can be a pain. Let's have a quick look at them, and see if we can make them a bit less scary.
Generally when people bring violins in because the pegs don't work it's either because they're too stiff or they won't hold tune. Violin pegs are a tapered peg going into a matching tapered hole – if they're pressed in too far they will bite firmly into the hole and not want to move, and if they're not far enough in they will spin loose in the hole. There's an additional complication that wooden components are sensitive to temperature and humidity and sometimes the wood in your pegs or peg box will swell or contract causing pegs that previously fitted really well to no longer work as they should.
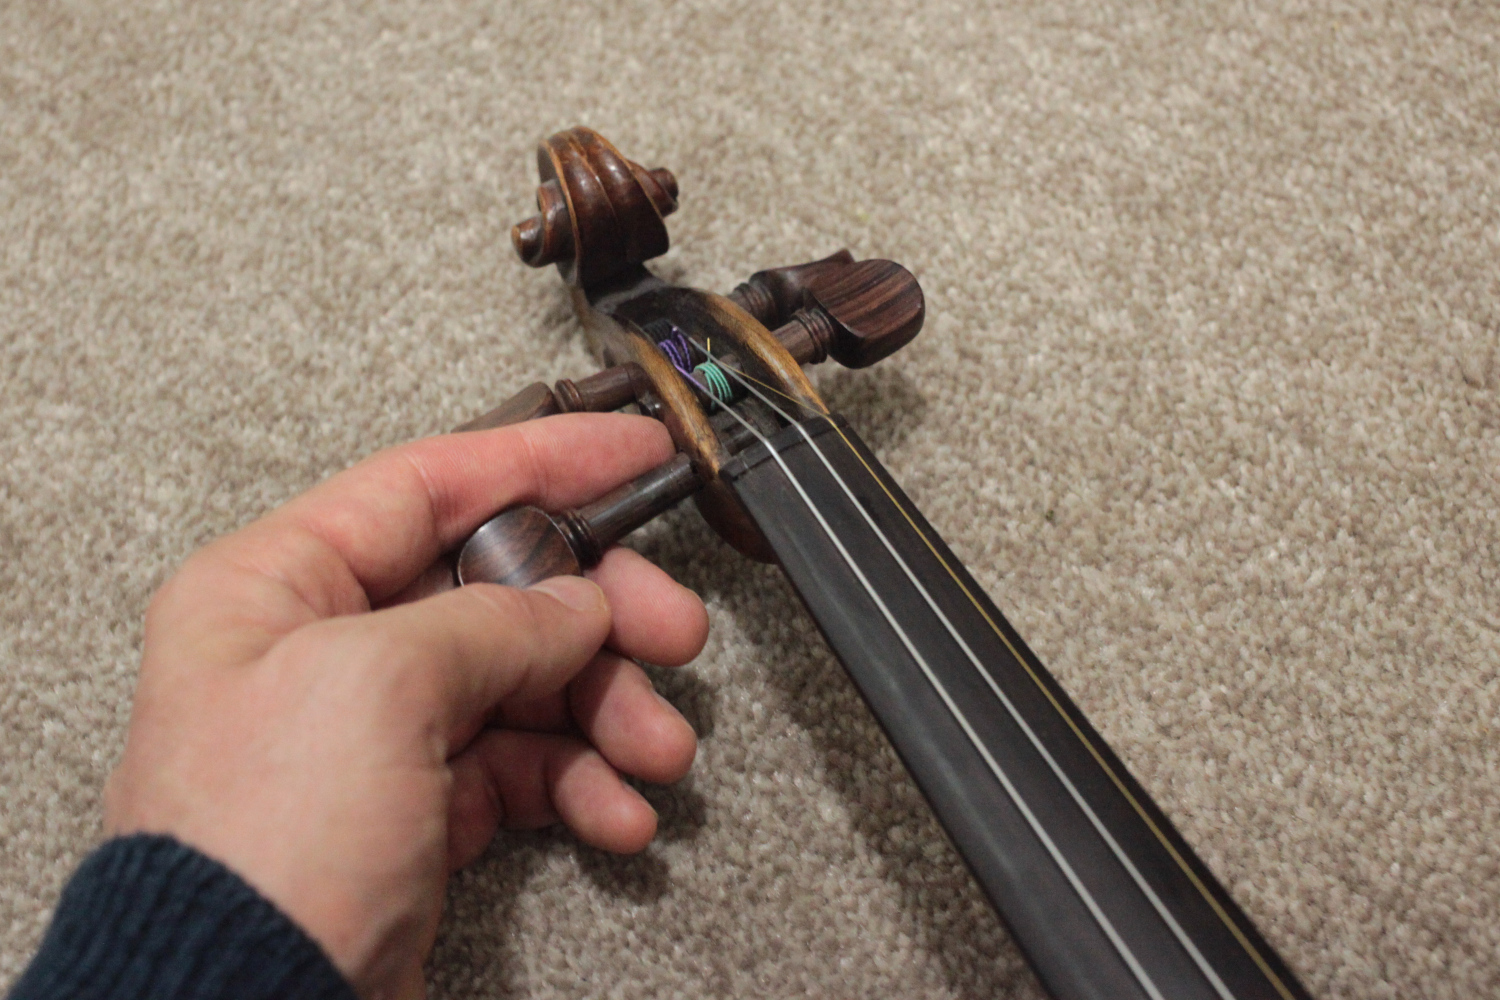
If your peg doesn't want to move, you need to ease it out of the pegbox. Sit down with the violin in your lap, hold the pegbox in your non-dominant hand, gently but firmly turning the peg whilst also pulling it away from the peg box. If the string is still attached, remember to turn the peg so the pitch goes down not up, otherwise you're fighting the string and stand a good chance of breaking it. If the peg is able to move at all you should find it quickly comes loose. Sometimes the peg won't move, and there's a risk you'll break it in trying to dislodge it particularly in cheap student instruments where the wood isn't of great quality. If you do it's not the end of the world, but you'll need a violin repairer (or at least a competant wood worker to drill out the broken peg so it's not ideal – we'd suggest if you can't get the peg to move to bring it in, that way in the worst case scenario we can at least replace the peg for you.
If the peg slips, it's a lot easier: it simply needs to be pushed further into the taper. As you turn it, gently push inwards and you should feel it begin to grip. It won't need a great deal, just enough for the surfaces to press against each other enough to create a bit of friction.
Sometimes pegs benefit from a bit of help: constant use of the pegs burnishes the wood at the contact points and this can be alleviated by use of peg paste, a plasticine like compound that can be put on the contact points. Peg paste is a really handy thing to have in your violin case – it works equally well whether your pegs are in the habit of sticking or they're constantly getting loose.
As pegs wear, their shape becomes less perfect and they don't grip very well. Eventually you will find a service necessary to reshape the surfaces so that they work smoothly again – any violin repairer should be able to help you with this.
My string came off!
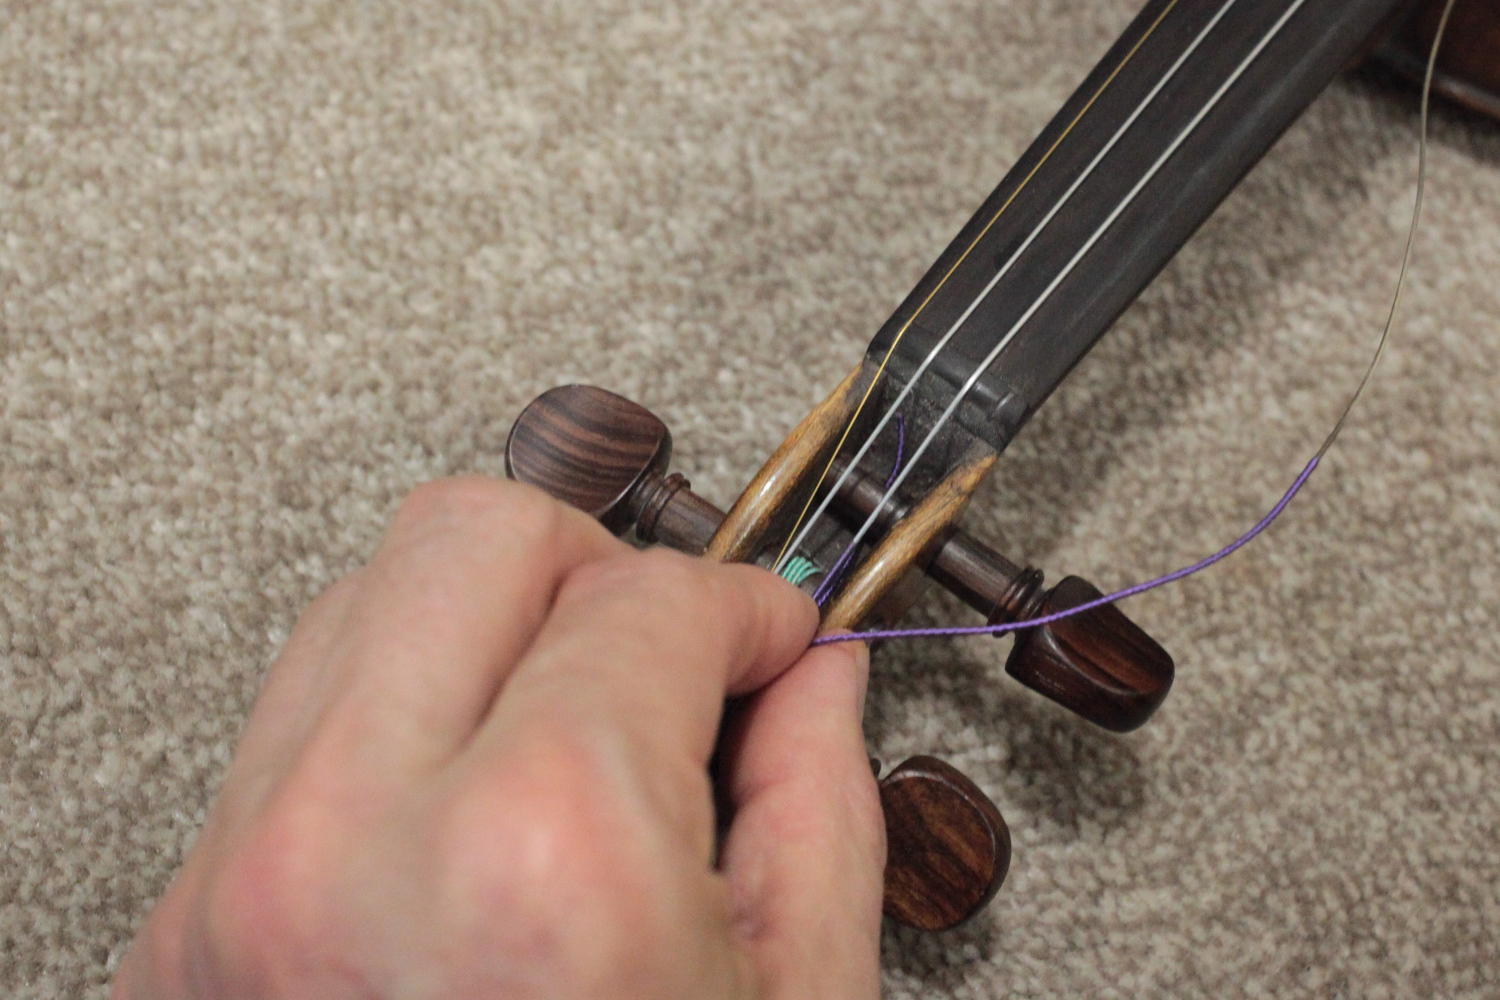
This usually goes hand in hand with a peg popping out and it's an easy fix. First check that the string isn't in fact broken: check it along its length looking for obviouus breaks or if the winding appears to be coming uncoiled. If it's broken you'll have to remove and replace it.
If it's not broken then you can reinstall it. Turn the corresponding peg until you see a small hole in the shaft. Thread the end of the broken string through the hole so that there is a little bit (at least 5mm) sticking out the other end. Then wind the string back onto the peg, guiding it so that it sits where you want it on the peg. With the bit of string poking out the other side as a guide, you want one wrap of the string going past it on the side heading towards the thin end of the taper and subsequent wraps going on the other side, each one on the peg button side of the previous. If you end up with so many turns that the string presses up against the side of the peg box, unwind again and pull a little more through the hole – if the string is pressing too tightly at that point it can get it the way of the peg doing it's job, and it's possible the person who installed it left a bit of excess string.
I broke a string!
We're going to direct you to a previous blog we wrote on restringing violins here. It will tell you all you need to know! If it's just one string it's nice and easy as you don't have to worry about the bridge location or anything like that.
My bow doesn't work!
Ok, you bought a violin online or maybe someone bought it as a present, it took you three hours to tune it and you finally tried to play a note and no sound came out!
Don't panic, you just need to rosin it! New violin bows have no rosin on them and it's the rosin that creates the friction between the hair and string so they need a lot of rosin to get them going. If the bow doesn't grip immediately it just needs more. If you're also using a brand new rosin with a shiny surface, roughing the surface (just scratch it with a knife blade) will make it take far quicker.
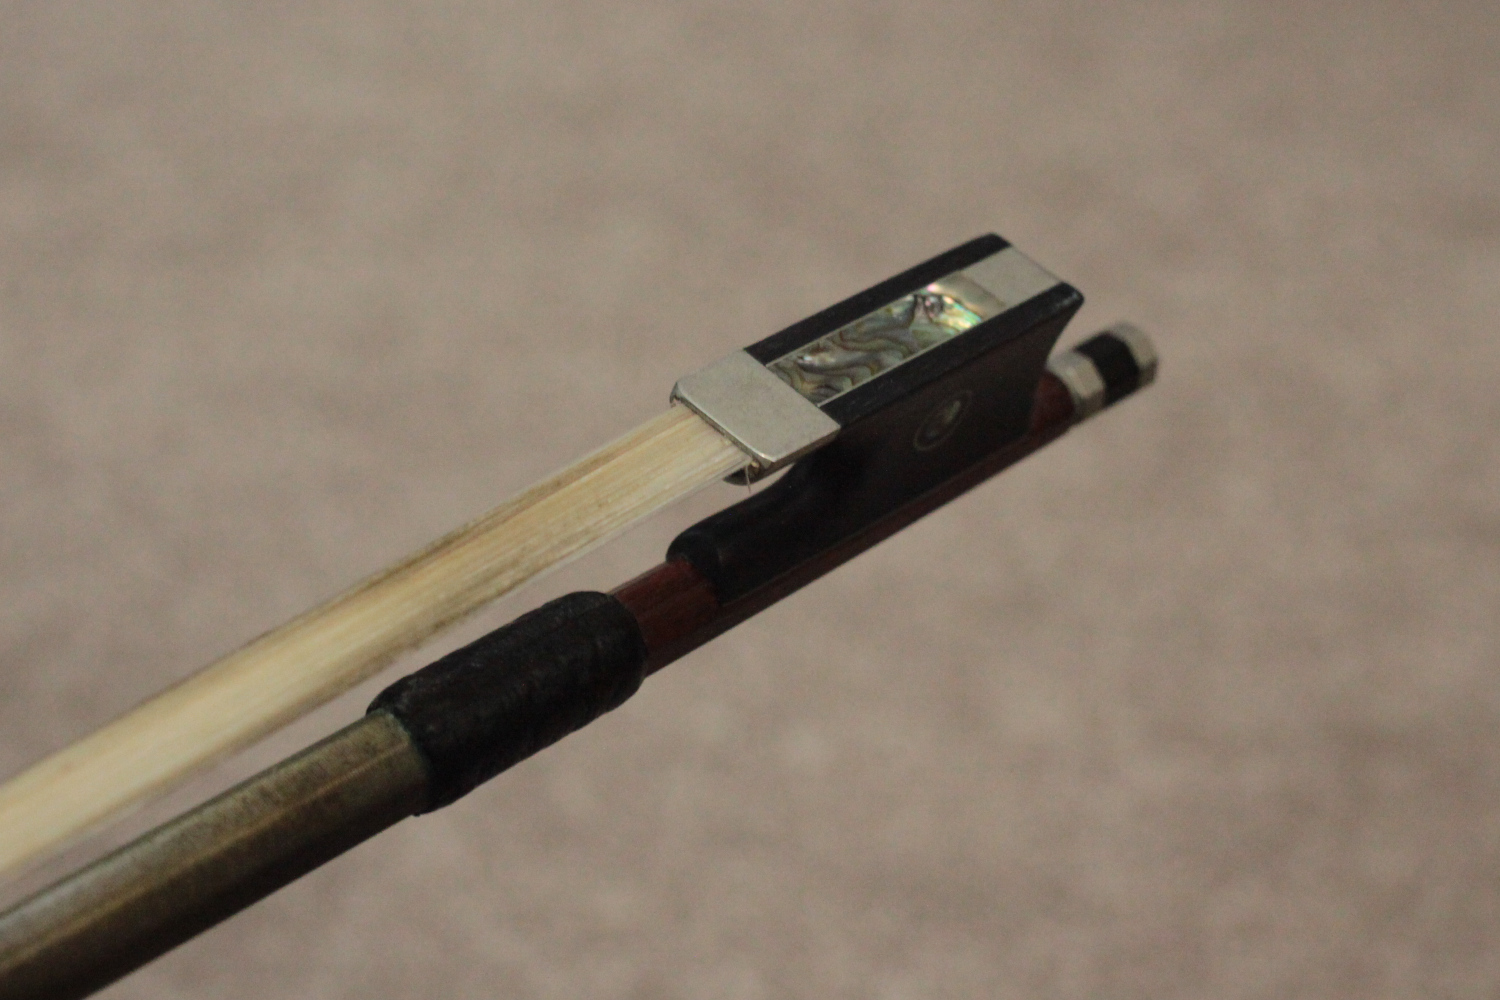
A bow not making sound is an extreme example, but bows often feel like they're underperforming so if you're worried about how your bow feels it's worth having a closer look to see what's going on. Firstly, how much hair do you have on it? Violin bows can function with surprisingly little but if your bow is obviously missing a lot of hair – you'll see all the broken bits at either end – then it's likely it won't be doing it's job properly. In addition to this, bow hair eventually wears to the point where it doesn'y take rosin very well: on the bow pictured the hair is very worn near the frog (that's the bit under your thumb!) and will not grip as well as it should.
If the hair is damaged or beyond it's best heap bows are most easily replaced as you can buy them for less than the cost of a rehair and rehairs on cheap bows are often a challenge to do neatly, but if it's a nicely made bow then you can have the hair replaced professionally for a cost of £40-50.
I want to clean my violin!
Cleaning violins ranges from very easy to hours of work depending on the condition. If you have a modern violin that has a hard, glossy looking lacquer finish like a guitar finish, they're relatively easy to clean and for the most part we use guitar polishes to spruce to remove fingerprints and generally spruce up beginner instruments. If there's a lot of rosin build up, we really like Hill's violin varnish reviver as a cleaning product for breaking down layers of rosin. For more expensive instruments with oil or spirit varnishes we use the Hill product, working in small circles with a microfibre cloth, to gradually lift layers of dirt and restore the original lustre of the finish: on a violin with decades of grime to remove this can be a labourious process!